
Windows “NCSI” is “Network Connectivity Status Indicator”, which monitors network internet connectivity by actively probing the connected networks for internet access. This is a part of Windows networking that attempts to provide a seamless internet experience in a dynamic WiFi environment. As sailors, our WiFi environment is certainly dynamic but also not always well-behaving in convention terms. Offshore, connections are slow and costly, and hopefully firewalled against unwanted use. In particular, the Iridium GO! won’t connect to internet until configured by Airmail or another app. This, in turn, causes NCSI to provide bad advice to Windows networking which can result in disconnections.
NCSI runs two tests: First is DNS (will be to 192.168.0.1 if the GO is connected), which will fail– hence a “No internet” indication. If DNS succeeds then NCSI fetches a test page from a Microsoft site, which will also fail of course. If DNS succeeds but web-fetch fails, then it says “limited or no connectivity”. Neither of these tests will work with the GO (or any other firewalled connection), which causes Windows to try to “help” by finding a different connection.
NCSI active testing can be disabled. That doesn’t effect normal networking, auto-connect will still work for example. What it will stop is disconnecting the GO (or other firewalled connections) because Windows thinks they don’t work.
Here are the instructions:
- Open Windows Group Policy Editor: Windows button, enter “gpedit.msc”. This opens the “Local Group Policy Editor”.
- On the left side navigate to: Computer Configuration, Administrative Templates, System, Internet Communication Management, Internet Communication Settings .
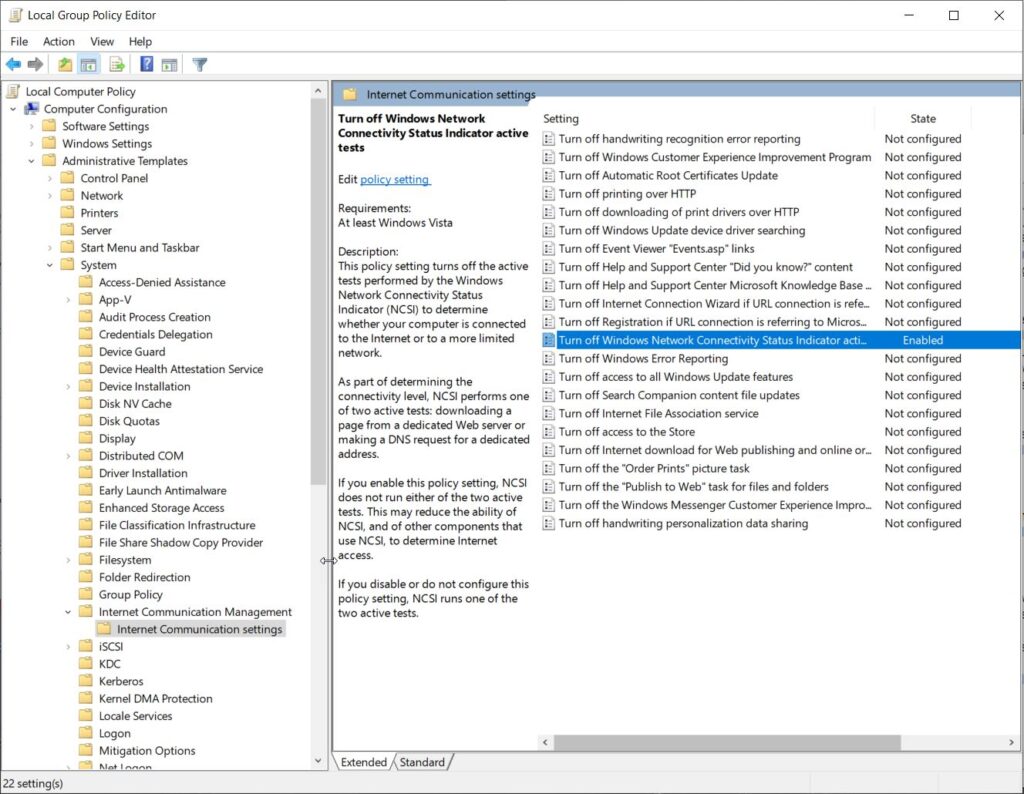
- On the right side find “Turn off Windows Network Connectivity Status Indicator active tests”.
- Double-click that setting, verify that you are in the right place (see image), then select “Enabled”. Entering a comment is optional but useful.
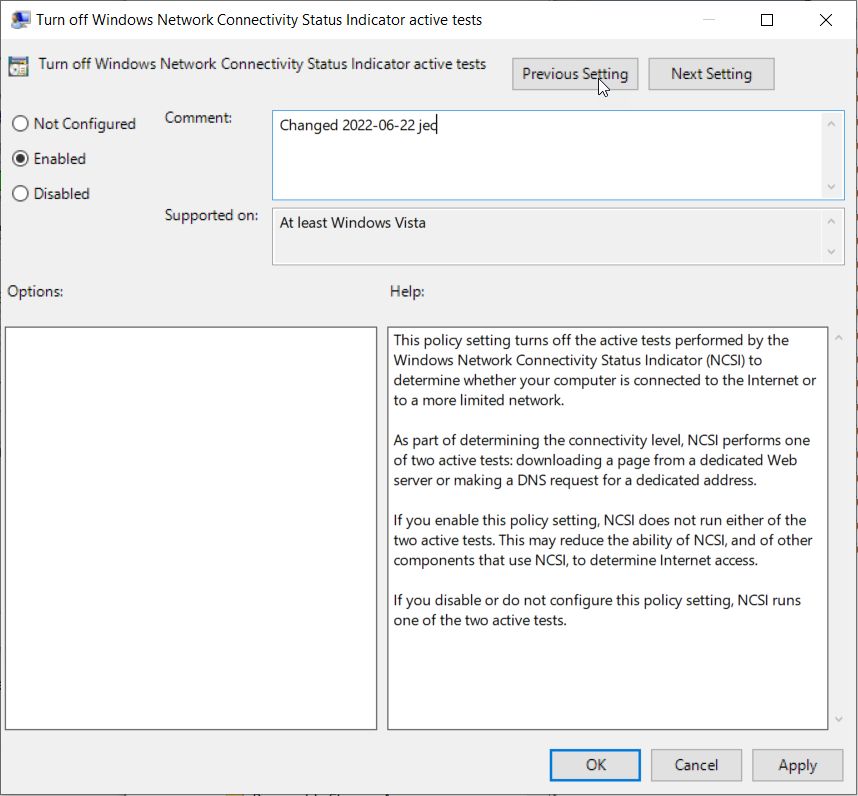
- Close the Group Policy Editor and then Re-Boot the computer for this to take effect.
And don’t forget to reboot…
To Un-do this setting, navigate back to the same page and select “Not Configured”.
Note that the Iridium WiFi connection may still show “No internet”. There is also passive testing– watching other internet activity to see if it is successful– but this doesn’t seem to trigger a disconnection.
It is also essential that other WiFi networks be set to NOT connect automatically. This is done through Windows settings, Network & WiFi, WiFi settings., “Manage known networks”. Delete any “known networks” which you don’t actively use, and check the properties of the remaining networks to be sure that ONLY the Iridium GO (or another satellite network) has the “Connect automatically when in range” setting enabled. All others should have auto-connect disabled. This, plus disabling NCSI, tells Windows that (a) you want to auto-connect to the Iridium GO and (b) don’t worry if it actually doesn’t actually connect to internet.