Category Archives: Satellite Phones

Information, FAQs and notes on using sat phones with SailMail

SailMail via Iridium GO! exec

The Iridium “GO! exec” is Iridium’s Certus-100 terminal, a completely different device than the Iridium “GO!”. The original GO! is quite slow (2400 baud), but has an available unlimited data plan which makes it quite attractive from a cost point of view. Access to the original GO! is also restricted to approved apps (including Sailmail), and Airmail includes a special “Iridium GO” device selection to support connections to Sailmail.

The GO! exec is considerably faster (88K baud) but usage is all charged per MB– there are no unlimited* plans (see below). So it is necessary to manage the data connections, otherwise browsers, windows updates, etc will all have a wild party with your credit-card. This is done by setting up a firewall “profile” in the GO! exec for Sailmail (or other services that you want to use), limiting access only to those servers.

Continue reading

Iridium 9555 and 9575/Extreme and Win-10 Drivers

An Iridium 9555 or 9575/Extreme handset connects to the computer via a USB cable, and will need USB drivers to function properly. Iridium offers a driver-installer program, but with a spring 2021 Win-10 update that quit working properly. For recent Win-10 versions, we recommend either using Windows default drivers or installing the Iridium drivers manually as described below.

First, check your Windows-10 version: Open Windows settings, select “System” and then “About”. The Windows version is shown at the bottom. For Windows version 2004 (build 19041.xxxx) or later, use the Windows default install below. For earlier Win-10 versions (ver 1909 or earlier) then use the Iridium Driver-Installer below. Earlier versions of Windows (e.g. Win-7) should use the manual installation below.

Windows default: Updated versions of Windows-10 will install the correct driver for the Iridium handsets. If you open Windows Device manager before connecting the phone, then you can check the install and note the COM-port number (e.g. COM3) for setting up the connection.

Open Windows Device Manager (use Windows Search for that name), find “Ports” and expand that. This will show any serial ports that are plugged in (including the Iridium “USB Serial Port” once configured).  Now connect the phone, and Windows will install it as a “USB serial device” and you will see that appear in the “Ports” list. Note the COM-port number (e.g. COM3).

Also check that the drivers installed correctly: Double-click the “USB Serial Device” in Device Manager (or right-click and select “Properties”), and check for “This device is working properly”. If you see that, and no yellow warning icon, then you are all set, proceed to the Iridium set-up page.

You can also proceed with the manual install below. This will change the device name from the generic “USB Serial Device” to “Iridium 9555A Handset USB Serial Port” (or similar) “. The drivers however are the same, just a different device name.

Manual driver installation: If you see a yellow warning icon in Device Manager, or if the device “Properties” window indicates an error, then manually install the drivers as follows:

A CD-ROM disk that came with a recently purchased phone should have the correct driver files (.inf and .cat files). You can also click here to download them. Open the “zip” file and copy the “Iridium-9555-9575” folder to a “Drivers” folder on your hard drive (C-Drive), create a “Drivers” folder first if needed.

To manually install the Iridium USB drivers, right-click on the “USB serial device” that appeared when the handset was plugged in, and select “Update drivers”. Click “Browse my computer…”, and browse to the “Iridium 9555-9575” folder under Drivers on the C-Drive. (Or the CD drive if using that). Be sure that “Include subfolders” is checked.  Click “Next” and verify that Windows successfully updated the drivers. Windows Device Manager should now show “Iridium 9555A Handset USB Serial Port” (or similar) with the same COM-port number.

If Windows indicates that the “Best drivers are already installed”, or if you still see an error or yellow warning icon, then delete the current drivers as follows and then repeat the manual installation.

To delete the Iridium device drivers, right-click on the USB Serial Port device and select “Uninstall device”. If you see a box for “Delete the driver software for this device”, then check that. Then click “Uninstall”. Next, select Device Manager’s “Action” menu and click “Scan for hardware changes”, or disconnect and reconnect the handset.  Depending on the Windows version, this will install the default Windows USB/serial drivers or you can repeat the manual install, above. Note the Comport-number when Device Manager refreshes, you will need that for the modem setup.

Iridium Driver-Installer: If you have an earlier version of Win-10 (1909 or prior) and are unable to update or prefer not to, then you may need to use Iridium’s Driver-Installer. This only works properly for older Windows versions. There is no harm in trying it, however, and it can be removed as described above. Click here to download a copy, or download it from the official iridium driver page here: https://www.iridium.com/services/data-tools/ 

Troubleshooting:  If you previously installed Iridium drivers using the Iridium driver-installer program then you will see “Iridium Handset USB Serial Port” (or similar) instead of “USB Serial Device”. If it has a yellow warning icon then delete the drivers (see above), otherwise give it a try. It may work depending on your Windows version.

The original Iridium USB drivers (prior to 2016) for the 9555/9575 handsets were not compatible with Windows 10, resulting in a “blue screen” (BSOD) Windows crash whenever the USB port was opened. It took a long time for updated drivers to become available, in the meantime we created a work-around (details below) which is no longer needed. So if you see a warning from Airmail that the “Iridium drivers may not be correct…” you should ignore that. Check the “stop asking” box and click OK.

If you have already done our previous workaround, then there is no need to un-do that. If you installed ver 3.5.041 of our Airmail software and used the driver-checker then again this works fine, but you can re-open  Airmail’s “Check Iridium Driver” (under Tools menu) and click “Reset Driver-Test Mode”.  Also, if you disabled the UEFI “Secure Boot Mode” then you can re-enable that if you want:  From the Windows button click Power, Shift-Restart, Troubleshoot, Advanced Options, UEFI Firmware settings, Restart, “Secure Boot Control”.

The official iridium driver page is here: https://www.iridium.com/services/data-tools/ However, only the driver-installer is listed there. That no longer works properly as of mid-2021 so do the manual install above.

Once the drivers are installed, go back to the Iridium set-up page to finish the setup.

Troubleshooting Internet / Satellite gateway settings

Of the various ways to connect to Sailmail via the internet, using Airmail’s satellite access (internet/telnet window) is by far the most efficient. It is ideal for satellite connections as well as “challenging” marina wifi connections as it supports the same compression, error-checking, and resume functions used for radio connections. This connection also uses static-IP addresses for the gateway connections for speed and security.

The only drawback is that addresses change when we move, and we recently (May-June 2020) upgraded our main servers which changed the IP addresses. We have established separate gateway servers (also with static IP addresses), and posted notices on the old servers and sent update notes to all members.

This only applies to satellite or Internet connections using Airmail’s internet/satellite (Telnet) access window. Radio connections, webmail, and pop/smtp email are not affected.

If you missed it, here is what to do:

  • If you have internet access, click here to go to our download page for Airmail software for Sailmail. Download and install version 3.5 (either the regular release or beta), that will also update your Airmail software and also update the gateway settings (for downloads since May 22, 2020). Do this, if possible, even if you already have Airmail ver 3.5, because it will update the internet settings.
  • If you don’t have internet, or don’t want to update Airmail at this time, then check which version of Airmail software you currently have: Click on the “Help” menu, then select “About”.
    • If you currently have Airmail version 3.5 installed (and downloaded prior to May 22) then click here for the Airmail 3.5 notes.
    • If you currently have Airmail version 3.4 installed then click here for the Airmail 3.4 notes.

And if you just want to check it, then open Airmail’s Internet/satellite window (yellow “lightning bolt” button, select “Server1”, and click the green connect button. It should connect and identify as “SMSG1” (Sailmail SateGate-1). Then select “Server2”, and connect- it should identify as “SMSG2”, and “Backup1” should identify as “WQAB964” (our San Diego station masquerading as a backup gateway). There may be additional entries, ignore those.

Tradeoffs between satellite systems

Satellite Systems, Handsets, and Hotspots

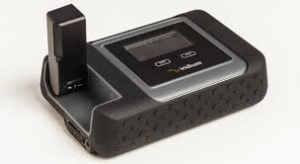
The Iridium GO! has the cheapest data plan. Plans vary so be sure to shop around. Among other

Iridium GO!

Iridium GO!

airtime vendors, check the prices at www.OutfitterSatellite.com     Iridium units and Inmarsat isatphone have different strengths and weaknesses. Iridium’s satellites are in low-earth orbit (LEO’s) and are relatively close, meaning strong signals and an easier connection from you to the satellite. Being in low orbit they move quickly relative to the earth and sometimes data calls are dropped. Inmarsat uses geostationary satellites, which will always be in the same location in the sky, but are much farther away which means weaker signals and slower speeds but fewer dropped data calls.  Globalstar uses low satellites but only works when a satellite is in simultaneous view of both the vessel and a shore station.  This limits Globalstar’s coverage to within a few hundred miles of shore, in spite of the name.

In any case, a proper external marine antenna is important, located where it has a clear view of as much sky as possible.

There are three choices for Iridium products, the GO!, the 9555 and the 9575 “Extreme” ruggedized phone. The GO! has the cheapest data plans but is fiddly to use for phone calls

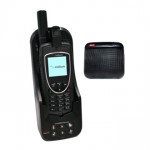
Iridium Extreme in a dock

Iridium Extreme in a dock

because it requires the additional use of an iPhone connected via wireless.  The Iridium 9575 Extreme is handier in an emergency. The Extreme can be used by itself to make phone calls and is water resistant.  Both the Iridium Extreme and the GO! contain GPS and GEOS emergency button. So if your Extreme or GO! is registered with GEOS (free), you can press the red button, and folks on your registration list, as well as SAR authorities, will be forwarded your location and your request for help.

Most folks go with Iridium over Inmarsat and Globalstar, and most folks select the Iridium GO! unless they want a device to also be handy to make calls in an emergency, in which case they buy an Iridium Extreme and pay higher data rates.

Data communications costs about $60 per megabyte over Iridium, unless you pay $125 per month for the unlimited data plan on the Iridium GO!.

Wide Bandwidth Satellite Dome Systems

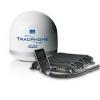
Inmarsat FB150

Inmarsat FB150

The Inmarsat Fleet Broadband 150 is a 13 inch dome that provides 150kbps data at $25 per megabyte, with nearly worldwide coverage.  Inmarsat also has a “Fleet One” version of this system but it isn’t useful due to its limited coastal coverage.

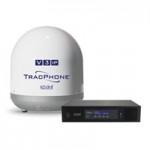
The KVH V3 is a 14.5 inch  dome that provides 300kbps data at $1 per

megabyte with coverage of any place that a sensible cruiser is likely to go.

KVH V3

KVH V3

SailMail via Iridium Handsets

While the Iridium GO! provides somewhat cheaper cost for transferring data, Iridium handsets can also be used to transfer data. Handsets also have an advantage in that they self-contained for voice calls in an emergency.  The Iridium Extreme phone is water-resistant, incorporates a GPS, and has an “SOS” button that allows it to be used to summon help, as does the GO!.  Some cruisers buy a “dock” like the one in the photo below from Beam.  When in the dock the Extreme phone is connected to the external antenna, power, and to the computer/USB, and is kept charged.  It can be quickly removed for manual use.  Note that the Iridium GO! and Iridium handsets transfer data at about the same speed, but the Iridium GO! has cheaper data rates and connects more quickly.
DriveDOCKExtreme_medIridium offers a “PPP Data Service” for their handsets, which is simpler and quicker than using the Iridium “Direct Internet Service” or a “Dialup” connection.  This is a direct-to-internet connection through the Iridium internet gateway. The advantages are simplicity (no fancy compression or proxy-servers), no other internet service provider required, and faster setup. This service is perfect for checking mail with SailMail’s direct internet access (aka “Telnet”). This document describes how to set up an Iridium PPP connection.


Drivers: USB drivers are needed for the Iridium 9555/9575 handsets, see this page for more info.

Also be aware that Windows-10 has been reported to “update” Iridium drivers with drivers that don’t work. If you encounter that, re-install the correct drivers.

Prior to using your Iridium phone for a PPP internet connection for the first time, you need to set up a “Standard 19200 bps” modem driver on your computer, and then set up a dial-up networking connection for the Iridium-PPP service.  These steps are both described in detail below for Windows 7, 8 and 10:


First step: Install a Modem-Driver:

1. Close all applications (at least any that use the internet).
2. Open Windows Control Panel (Windows search box is your friend here).
3. Set “View by” to large or small icons, then double-click on “Phone and Modem Options”.
4. Select the “Modems” tab and click “Add”…
5. Check “Don’t detect my modem; I will select it from a list” and then click “Next”.
6. Select “Standard Modem Types”, then “Standard 19200 bps Modem” and then click “Next”.
7. Click the “Selected ports” button and highlight the COM Port that you will use with the Iridium phone (e.g., COM3). Click Next, then Finish.
8. Now go back to Control Panel, open “Device Manager”, find “Modems” and expand that, and find the “Standard 19200 bps Modem” that you just created. Double-click that to open “Properties”, and select the “Advanced” tab.
9. In the “Extra initialization commands” box, enter: AT+CBST=71,0,1
10. Double-check that, then click OK, then close Device Manager.

(Note: You can see the modem properties box via “Phone and Modems”, but the “Extra initialization commands” box is disabled. Go through Device Manager instead).

Second step: Configure a Dial-Up Networking connection

1. Open Windows Control Panel and select “Network and Sharing Center”.
2. Click “Set up a new connection or network” and then click Next.
3. Select “Connect to the Internet” and click Next.
4. If you see “You are already connected to the internet”, click on “Set up a new connection anyway”.
5. If you see “No, Create a new connection” select that, unless you are checking settings of an existing connection.
6. Click on “Dial-up”, and (if prompted) select “Standard 19200 bps Modem”.
7. In the “Dial-up phone number” box enter 008816000025 (see “Note” below)
For User name and Password enter “none” (type that in, without the quotes),
Check the “remember password” box.
For “Connection Name” enter “IridiumPPP”
8. Then click “Connect”, Windows will try to connect– click “Skip” to continue.
9. Click Close and return to Network Center.
10. Click “Change Adapter Settings” on the left, find “IridiumPPP” and right-click and select “Properties”. (Or, open the connection and then click the “Properties” button).
11. On the first tab make sure “Use dialing rules” is not checked, and click “Configure”
12. Then click “Configure”, and check all three hardware features, then click OK.
13. On the “Networking” tab, un-check all items except “Internet Protocol Version 4 (TCP/IPv4)”. (If any items won’t un-check, that is OK).
14. Click OK to close.

NOTE:  Telstra customers should use the Telstra data number “66666”. The “0088…” number will also work but may be charged at a higher rate.

To connect manually, click on the Networks icon in the system-tray (lower-right corner of the screen), select “IridiumPPP” and select “Connect”. Repeat to disconnect. You can also get to the connections properties from this window.

The following details are important:

1. Don’t forget the “Extra initialization string” in the first section, this is critical.
2. Under Network Connections (second step), only “TCP/IP” should be checked.
3. You need the COM-port number associated with the phone. (The 9555 phone installs as a COM port, use the driver CD supplied with the phone).
4. You must be logged into Windows with Administrator privileges.

Once all that is done, open Airmail’s “Telnet” window (click the “Internet” button on the toolbar or open the Modules menu then Telnet-client). Check the “dial first” box in the Telnet window, and select the “Iridium PPP” connection, and make sure that the “hang up” box is also checked. In recent versions of Airmail the Telnet-window is already set up, just select “Server1”. Also be sure to select “Set up dedicated route”, this will block other programs from trying to “hijack” your Iridium connection.

To check mail, click Airmail’s “Internet” button (or go to Modules menu, Telnet-client), make sure “Server1” is selected, and click the green “connect” button. Airmail will dial the phone, contact the server, and exchange mail. Watch the connection and make sure it disconnects when finished. (in the rare case that the primary server is unavailable, there are also two backup servers available).

Troubleshooting:

Remember that the Iridium antenna must be outdoors, with a clear view of the sky. The best antenna is a proper fixed-mount Iridium marine antenna, they are not cheap but are strongly recommended if you are serious about it working reliably. The next-best is the small “hockey-puck” car-style antenna, IF it is stuck to a piece of metal (e.g. a car, or a metal pie-tin 8″/20cm or larger). It is meant to work on a car roof, and needs the metal ground-plane. The phone’s antenna also works (as a third choice), IF it is above-decks with a clear view and oriented vertically.

Also, remember that Iridium connections (voice or data) are relayed from satellite-to-satellite to reach an earth station. Your phone shows the signal strength to the first satellite only. If the next satellite is too far, or congested, then the connection can stall or be dropped.

  • If the phone doesn’t connect at all, check the signal and then check the modem and connection settings above. Also verify that the phone display shows “Data call”.
  • If the phone connects but you cannot connect to SailMail then check the Telnet settings below. You must be using port-50.
  • If you do not have an Internet/Telnet window at all then go to Airmail’s Tools menu, Options window, Modules tab, and check the box to the left of “Telnet Client”. Click OK.

To check your Telnet settings first open the Telnet window (click the “Internet” button or go to Airmail’s Modules menu and select Internet or Telnet Client). Make sure “SailMail” is selected if you have also configured Airmail for ham use. Select “Server1” and click “Settings”. (From Airmail 3.5 these settings are part of the system settings, click Edit menu, then Settings. For earlier Airmail versions the settings may need to be entered manually).

Here are the correct settings (from mid-2020):
remote callsign: Server1 (or SMSG1)
remote host: 18.208.67.17 (see * note)
Port: 50
TImeout: (blank)
Local callsign: (your SailMail callsign/ID, see ** note)
Password: (your SailMail internet password, Case-Sensitive!).
Click OK to save settings.

* Note: Using the numeric IP address is strongly recommended, it saves airtime and is more secure. But remember that this address may change if we need to shift servers– so if you cannot connect then enter “server1.sailmail.com” and note the address which is shown when you connect. (Don’t include the quotes shown here). A second server is server2.sailmail.com with the address 44.232.19.175 both using port 50.

** Note: For Airmail 3.5 and later your Callsign/ID and password are entered in the Options window (Tools menu), Settings tab, on the left side under the small “Sailmail” tab).

And finally, if you want to initiate a PPP Data call manually for testing, click on Window’s Networking icon in the lower-right and select the “Iridium PPP” connection and click “Connect”. But don’t forget to disconnect when you are finished!

Cheers, Jim
support@sailmail.com
(revised 2021-06-14)

SailMail via Inmarsat IsatPhone Pro

The Inmarsat IsatPhone Pro offers a low-seed internet access which works well for connecting to Sailmail. There is one important caveat: The Inmarsat gateway allows full internet access, which means that other programs (including a variety of auto-update software) can hijack the connection and slow it dramatically, or even bring it to a virtual halt. It is important to disable other software, Airmail 3.5 includes a “Dedicated Route” option which solves this in a simple way.

In order to make a data connection, the IsatPhone Pro firmware must be version 4.0.0 or later (check the phone’s Settings menu, “About”). The updater software is found on the CD that came with the phone, and firmware files can be downloaded from Inmarsat (www.isatphonelive.com/support).

Also, you must have a data-enabled SIM card, check with your Inmarsat service provider. This is critical. You will also need the USB Device Drivers for the iSatPhone Pro, to connect it to the computer, those are also included on the IsatPhone CD, or can be downloaded from the “IsatPhoneLive” website above.

Run the USB-driver installation program before connecting the phone. Once you’ve got the USB drivers installed and the phone connected to the computer with no device-driver error messages from Windows, then you need to tweak the modem settings, and create a Windows “dial-up connection” to make use of the data connection.

Part One: Modem settings:
===========================
1. Open Windows Control Panel, select “small icon” view, and open “Device Manager”.
2. In Device Manager find “Modems”, expand that, and find the “iSatPhone Pro 1.0 Modem”.
3. Double-click that to open “Properties”, select the “Modem” tab, and set the “Maximum Port Speed” to 2400.
4. Now select the “Advanced” tab, and enter “&FE0&D2” in the “Extra Initialization” box (without the quotes, and “FE” is followed by the number zero).
5. Click OK, and close the Device Manager window.

Part Two: Configure a Dial-Up Networking connection
======================================================

For Windows-7 (Win-8 is similar):
————–
1. Open the “Network and Sharing Center” window from Windows Control Panel.
2. Click “Set up a new connection or network” and then click Next.
3. Select “Connect to the Internet” and click Next.
4. If you see “You are already connected to the internet”, click on “Set up a new connection anyway”.
5. Then select “No, Create a new connection” (unless you are checking settings of an existing connection).
6. Click on “Dial-up”, and (if prompted) select the “IsatPhone Pro 1.0 Modem”.
7. In the “Dial-up phone number” enter 28
For User name and Password enter INMARSAT (for both, all cap’s),
Check the “remember password” box.
For “Connection Name” enter “IsatPhone Pro”
8. Then click “Connect”, Windows will try to connect– click “Skip” to continue.
9. Click Close and return to Network Center.
10. Click Change Adaptor Settings” on the left, find “IsatPhone Pro” and right-click and select “Properties”. (Or, open the connection and then click the “Properties” button).
11. On the first tab make sure “Use dialing rules” is not checked, and click “Configure”
12. Then click “Configure”, set “Maximum speed” to 2400, and select all three hardware features, then click OK.
13. On the “Networking” tab, un-check all items except “Internet Protocol Version 4 (TCP/IPv4)”. (If any items won’t un-check, that is OK). Click OK to close.

For Windows-XP:
—————
1. Open “Network Connections” window (Start-button, Settings, Network Connections).
2. Click “Create a new connection”, click Next.
3. Select “Connect to the Internet” and click Next.
4. Select “Set up my connection manually” and click Next.
5. Select “Connect using a dial-up modem” and click Next.
6. If a “Select a Device” window appears, check the box next to “IsatPhone Pro 1.0 Modem”, and uncheck all other devices. Click Next.
7. Enter a connection name (e.g., “IsatPhone Pro”) and click Next.
8. In the Phone Number box, enter 28 and click Next.
9. Enter INMARSAT (upper case) for both username and password.
10. Click Next, then Finish.
11. Click Properties for the new dialup connection, make sure “use dialing rules” is NOT checked.
12. Then click “Configure”, set “Maximum modem speed” to 2400, and check all three hardware features, then click OK.
13. On the “Networking” tab, make sure “Internet Protocol (TCP/IP)” is checked. Uncheck all other components (if they won’t un-check, that is OK). Click OK and close the connection box.

To connect manually, click on the Networks icon in the system-tray (lower-right corner of the screen), select “IsatPhone Pro” and select “Connect”. Repeat to disconnect. You can also get to the connections properties from this window.

The following details are important:
====================================

* Don’t forget the “Extra initialization string” in the Part One, this is critical.

* Be sure that maximum speed is set to 2400, in two places.

* Under Network Connections (second step), only “TCP/IP (ver-4)” should be checked (others are OK if they can’t be un-checked).

* Your SIM card must be current and enabled for data (check with your airtime provider)

* You must be logged into Windows with Administrator privileges.

Once all that is done, open Airmail’s “telnet” window (click the “Internet” button on the toolbar or open the Modules menu then Telnet-client). Check the “dial first” box in the Telnet window, and select the “IsatPhone Pro” connection, and check the “Dedicated Route” option. At the top, “Server1” should be selected (SMSG1 for previous Airmail versions).

To check mail, click Airmail’s “Internet” button (or go to Modules menu, Telnet-client), make sure “Server1” is selected, make sure the phone has a good signal (should be 4-5 bars) and click the green “connect” button. Airmail will dial the phone, contact the server, and exchange mail. Watch the connection and make sure it disconnects when finished.

It takes about a minute to get connected to the internet (airtime charges start after about 20 seconds), 20 seconds to connect to Sailmail and check mail, and 15-20 seconds to disconnect.

Troubleshooting:
================

Remember that the IsatPhone antenna must be outdoors, with a clear view towards the satellite. The best antenna is a proper fixed-mount IsatPhone marine antenna, not cheap but strongly recommended if you are serious about it working reliably. The phone’s antenna also works, IF it is above-decks with a clear view towards the satellite– orient the antenna generally towards the satellite.

If you do not have an internet/telnet window at all then go to Airmail’s Tools menu, Options window, Modules tab, and check the box to the left of “Telnet Client”. Click OK.

To check your telnet settings first open the Telnet window (click the “Internet” button or go to Airmail’s Modules menu and select Internet or Telnet Client). Make sure “Sailmail” is selected if you have also configured Airmail for ham use. Select “WRD719” and click “Settings”, or if not found then click “New”.
Check the following settings:
remote callsign: “Server1” (or SMSG1)
remote host: smsg1.sailmail.com or 18.208.67.17  (see ** note)
Port: 50
TImeout: (blank)
Local callsign: (your Sailmail/marine callsign)
Password: (your Sailmail internet password, Case-Sensitive!).
Click OK to save settings.

** Note: For quickest access select “Server1” or “SMSG1” as the server, make sure the port is “50”, and enter the numeric IP-address instead of the name “smsg1.sailmail.com” — this saves a few seconds. But remember that this numeric address may change if we need to shift servers– so if you cannot connect then enter the “smsg1.sailmail.com” (without the quotes) and note the address which is shown when you connect. A second gateway server is SMSG2, remote-host: smsg2.sailmail.com or 44.232.19.175 and port: 50.

If you want to initiate a Data connection manually, open the Dial-Up Networking window and open the “IsatPhone Pro” dial-up connection and click “dial”. And don’t forget to disconnect when you are finished!

support@sailmail.com
(revised 2015-10-18)

Connecting to SailMail via the Internet, using AirMail

If you have an internet connection into your computer (e.g. a Wi-fi or cell-phone connection in port, or an Iridium or Inmarsat satellite connection offshore) then you can use AirMail to directly retrieve your SailMail messages over internet instead of connecting via HF-Radio. This is very handy when you are in a marina where internet access is available, and is useful offshore as an anternative to radio.

Just press the “internet” button on the message index window, which looks like a lightning bolt. In the window that then opens up, press the “connect” button, which looks like a green ball. If your internet access is working you will retrieve and send all of your SailMail messages just as if you had a (very fast) connection via radio.

You need an internet connection of course. If you are connecting via marina WiFi or similar, test your internet connection by opening www.google.com in your browser. If you open a Google search page you should be able to send and retrieve your SailMail messages. (If not, see “Troubleshooting” below).


If you have any problems here are the details and settings.

For Airmail version 3.5 the internet settings are part of the “stations” update and are designated “Server1”, “Backup1”, etc.  To update those settings, send a (blank) email via Sailmail to: stations@saildocs.com and the reply-message will automatically update the settings. The settings will show in the Internet window settings box (Edit menu), but cannot be changed from there. They are stored in the Sailmail INI-file and updated with an updated “stations” message from Saildocs.

For Airmail ver 3.4 (or earlier) the settings are pre-configured but may need updating manually when there are changes. If you don’t see the yellow “lightning-bolt” button, or “Internet Access” or “Telnet” in the Modules menu, then open Tools menu, Options window, Modules tab, and make sure that the box to the left of “Internet Access” or “Telnet Client” is checked. Click OK.

To check (or add) server settings, first check the list of servers: If the server designation (Remote-ID) is listed below, select it and click “Settings”. Verify Remote-Host and Port, change as needed and click OK. The Port is always 50, timeout 120.

For Server1 the Remote ID is SMSG1, Remote Host is 18.208.67.17
For Server2 the Remote ID is SMSG2, remote host is 44.232.19.175
For Backup1 the Remote ID is WQAB964, remote host is 174.67.172.21
(The current list is always shown here: http://saildocs.com/stations

Select “Server” and click the “Settings” button (or click “New” if there is no listing for WRD719). Check or enter the following settings:

** Note: For quicker access via Iridium, use Server1 (or WRD719), make sure the port is “50”, and enter the numeric IP-address “72.32.198.206” instead of “pop3.sailmail.com”– this saves a few seconds. Note that this address may change if we need to shift servers– so if it won’t connect then enter the “pop3.sailmail.com” and note the address which is shown when you connect. (Don’t include the quotes shown here).


Troubleshooting

If you get an error instead of connecting, then double-check your settings and try port 50 instead of 50001, or vice-versa. Also try opening a web page in a browser. If you cannot open a web page, then find out why your internet connection is not working.
If you can open a web page but cannot connect to Sailmail, then it is likely that the internet provider has blocked port 50 and 50001. Ask them to un-block port 50 (or 50001), or read on:

There is one other trick, and that is to use Airmail’s “mail client” window to access Sailmail’s POP3 server. This is unlikely to be blocked for receiving mail, but may be blocked for sending mail. Here’s the skinny:

Connecting to Sailmail via Airmail’s mail-client window:

Open Airmail’s Tools/Options window, click on Modules tab, make sure that “Mail (pop/smtp) Client” is checked (enabled). Click OK to save changes and close.

Now go to Airmail’s Modules menu, Mail-client. If you don’t already have a “Sailmail” tab, then click “New”, enter “Sailmail” as the account-name (without the quotes, for all this), and enter the following settings:

On the right side, under “POP3 connection”, enter the following:
—————————————————————-
Server address: pop3.sailmail.com
Login name: (your Sailmail callsign)
Password: (your Sailmail password, same as for telnet)
Leave mail on server: No check-mark
(no entry for “days” or “KB” box)
Timeout: 60
Port: 110
Tick the box “Include in check-all”.

On the left, under “SMTP connection” enter the following:
———————————————————
Server address: smtp.sailmail.com
From Name: (your name or boat name, used only for the return address)
Email address: (your complete Sailmail address– callsign@sailmail.com)
Authorization: Check the “Login” box
Login: (your Sailmail callsign, same as above)
Password: (your Sailmail password, same as above)
Timeout: 60
Port: 2525
Check the box “Include in check-all”.

Now click OK to save and close, and then click “Check all” on the mail-client window to check your mail.

This uses the standard POP3 connection (port 110), that will certainly not be blocked.
For sending mail, many providers want you to use their own SMTP server. That’s fine, ask them what the server-address and login info is.

If you want Airmail to also dial a telephone connection then check the
“First dial…” box and select the appropriate connection. (Note: earlier
versions of Airmail did not properly disconnect even when the “hang up” box
was selected, always make sure that the phone disconnects).

Note that Iridium has blocked most internet ports, as a result Sailmail
is currently supporting both port 50 and 50001 on both servers- use port-50 for Iridium connections, or if there is any problem connecting to port 5001- it may be a blocked port for the local connection.

More information:
=================
For more details on accessing Sailmail via an Iridium sat-phone, see the FAQ post IridiumPPP

Also, for HAMS, remember that Winlink also supports Telnet but the settings
are different. Check the Airmail help file and the MBO List (View menu) for
settings and server addresses, or contact k4cjx@comcast.net.

Cheers, Jim
support@sailmail.com

(revised 2020-04-18)

SailMail via Globalstar

Globalstar offers a internet PPP data connection for their GSP-1600 and later phones. You will need the data cable for the phone, and for a 9-pin serial data cable you will need a USB/serial adapter (we recommend any of the adapters using the FTDI chipset, e.g. Sabrent CB-FTDI).

Prior to using your Globalstar phone for a PPP internet connection for the first time, you need to set up a “Standard modem driver” on your computer, and then set up a dial-up networking connection for the Globalstar PPP data service. These steps are both described in detail below for Windows 7, 8 and 10.

First step: Install a Modem-Driver:
===================================

1. Close all applications (at least any that use internet).
2. Open Windows Control Panel.
3. Set “View by” to large or small icons, then double-click on “Phone and Modem Options”.
4. Select the “Modems” tab and click “Add”…
5. Check “Don’t detect my modem; I will select it from a list” and then click “Next”.
6. Select “Standard Modem Types”, then “Standard 33600 bps Modem” and then click “Next”.
7. Click the “Selected ports” button and highlight the COM Port that you will use with the Globalstar phone (e.g., COM1). Click Next, then Finish.
8. Now go back to Control Panel, open “Device Manager”, find “Modems” and expand that, and find the “Standard 33600 bps Modem” that you just created. Double-click that to open “Properties”, select the “Modem” tab and set the max port speed to 38400.
9. Click OK, then close Device manager.

(Note: You can also access the modem properties box via “Phone and Modems”, but “max port speed” is disabled. Go through Device Manager instead).

Second step: Configure a Dial-Up Networking connection
======================================================

1. Open Windows Control Panel and select “Network and Sharing Center”.
2. Click “Set up a new connection or network” and then click Next.
3. Select “Connect to the Internet” and click Next.
4. If you see “You are already connected to the internet”, click on “Set up a new connection anyway”.
5. Then select “No, Create a new connection” (unless you are checking settings of an existing connection).
6. Click on “Dial-up”, and (if prompted) select “Standard 33600 bps Modem”.
7. In the “Dial-up phone number” box enter #777. Leave user name and Password blank, and for “Connection Name” enter “Globalstar”.
8. Then click “Connect”, Windows will try to connect– click “Skip” to continue.
9. Click “Close” and return to Network Center.
10. There should be no changes to the network properties, to check click “Change Adaptor Settings” on the left, find “Globalstar” and right-click and select “Properties”. (Or, open the connection and then click the “Properties” button).
11. On the first tab verify that “Use dialing rules” is not checked.
12. Then click “Configure”, and check that only Hardware flow control is checked, then click OK.
13. On the “Networking” tab, “File and printer sharing” and “Client for Microsoft Networks” should NOT be checked.
14. Click OK to close.

To connect manually, click on the Networks icon in the system-tray (lower-right corner of the screen), select “Globalstar” and select “Connect”. Repeat to disconnect. You can also get to the connections properties from this window.

Once all that is done, open Airmail’s “Telnet” window (click the “Internet” button on the toolbar or open the Modules menu then Telnet-client). Check the “dial first” box in the Telnet window, and select the “Globalstar” connection, and make sure that the “hang up” box is also checked. In recent versions of Airmail the Telnet-window is already set up, just select station “Server1” (or WRD719). Also be sure to check the box for “Set up dedicated route”, this will block other programs from trying to “hijack” your Globalstar connection.

To check mail, click Airmail’s “Internet” button (or go to Modules menu, Telnet-client), make sure WRD719 is selected in the callsign box and click the green “connect” button. Airmail will dial the phone, contact the server, and exchange mail. Watch the connection and make sure it disconnects when finished.

Troubleshooting:
================

Remember that the Globalstar antenna must be outdoors, with a clear view of the sky. The best antenna is a proper fixed-mount marine antenna, not cheap but strongly recommended if you are serious about it working reliably. The next-best is the small “hockey-puck” car-style antenna, IF it is stuck to a piece of metal (e.g. a car, or a metal pie-tin 8″/20cm or larger). It is meant to work on a car roof, and needs the metal ground-plane. The phone’s antenna also works (as a third choice), IF it is above-decks with a clear view and oriented vertically.

If the phone doesn’t connect at all, check the signal and then check the modem and connection settings above.
If the phone connects but you cannot connect to SailMail then check the Telnet settings below. You should be using port-50.
If you do not have an Internet/Telnet window at all then go to Airmail’s Tools menu, Options window, Modules tab, and check the box to the left of “Telnet Client”. Click OK.

To check your Telnet settings first open the Telnet window (click the “Internet” button or go to Airmail’s Modules menu and select Internet or Telnet Client). Make sure “SailMail” is selected if you have also configured Airmail for ham use. Select “Server1” or “WRD719” and click “Settings”, or if not found then click “New”.
Check the following settings:
remote callsign: “Server1” or WRD719
remote host: 72.32.198.206 (see ** note)
Port: 50
TImeout: (blank)
Local callsign: (your SailMail/marine callsign)
Password: (your SailMail internet password, Case-Sensitive!).
Click OK to save settings.

** Note: For quickest access use the main server (“Server1” or WRD719), make sure the port is “50”, and enter the numeric IP-address “72.32.198.206”– this saves a few seconds. But remember that this address may change if we need to shift servers– so if you cannot connect then enter the server name “server1.sailmail.com” and note the address which is shown when you connect. (Don’t include the quotes shown here). The backup server is “backup1” or WHV382, remote-host is backup1.sailmail.com or 64.119.5.153 and port is 50.

If you want to initiate a PPP Data call manually, open the Dial-Up Networking window and open the “Globalstar” dial-up connection and click “dial”. And don’t forget to disconnect when you are finished!

Cheers, Jim
support@sailmail.com
(revised 2015-12-21)

SailMail via Inmarsat Fleet BroadBand

This note describes using Sailmail with Inmarsat’s FleetBroadband service. The FBB terminals offer a relatively high-seed internet connection which works well with Sailmail, and Sailmail provides important protection against unwanted content as well as a means to prevent unauthorized use of bandwidth. This is an important consideration as the Inmarsat gateway allows full internet access. This means that other programs (including a variety of auto-update software) can hijack the connection and run costs up very quickly. Sailmail’s client program includes a “Dedicated Route” option provides this protection in a simple way.

Setup is done as follows:

First, open the FBB/BGAN web page (http://ut.bgan) and make sure that there is a “start standard” link on the “Dashboard” page. If not, see below for “Disable auto-connect”.

Then open the Settings menu, then LAN and then PPPoE on the left, and select “Enabled” for PPPoE. Click “Apply”.

Set up a PPPoE connection for Windows 7, 8 or 8.1 as follows:

1. Open the “Network and Sharing Center” window from Windows Control Panel.
2. Click “Set up a new connection or network” and then click Next.
3. Select “Connect to the Internet” and click Next.
4. If you see “You are already connected to the internet”, then click on “Set up a new connection anyway”.
5. Then select “No, Create a new connection” (unless you are checking settings of an existing connection).
6. Select “Broadband (PPPoE)”, click Next.
7. In the next window enter “void” for username and “void” for password (without the quotes).
(Note: If you have a login name and password from your airtime provider then use those).
Check the “remember password” box.
For connection name enter “Inmarsat-FBB” (or something descriptive).
8. Then click “Connect”, Windows will try to connect– you can click “Skip” to continue.
9. Click “Close” and return to Network Center.

That’s it. To connect manually, click on the Networks icon in the system-tray (lower-right corner of the screen), select “Inmarsat-FBB” (or whatever name was entered) and select “Connect”. Repeat to disconnect. You can also get to the connections properties from this window.
Once all that is done, open Airmail’s “telnet” window (click the “Internet” button on the toolbar or open the Modules menu then Telnet-client). Check the “dial first” box in the Telnet window, and select “Fleet” (or whatever name was used), and check the “Dedicated Route” option. At the top “Server1” should be selected (WRD719 for previous Airmail versions).

To check mail, click Airmail’s “Internet” button (or go to Modules menu, Telnet-client), make sure “Server1” is selected, make sure the phone has a good signal (should be 4-5 bars) and click the green “connect” button. Airmail will dial the phone, contact the server, and exchange mail. Watch the connection and make sure it disconnects when finished.

Troubleshooting:
================

Remember that you must be logged in as an administrator user to make system or settings changes.

If the terminal connects automatically (and no “Start standard” appears on the “Dashboard), then go to the Settings menu, then LAN on left, find the “Profiles” heading and set “Automatic Activation” to “disabled”.

If you do not have an internet/telnet window at all then go to Airmail’s Tools menu, Options window, Modules tab, and check the box to the left of “Telnet Client”. Click OK.

To check your telnet settings first open the Telnet window (click the “Internet” button or go to Airmail’s Modules menu and select Internet or Telnet Client). Make sure “Sailmail” is selected if you have also configured Airmail for ham use. Select “WRD719” and click “Settings”, or if not found then click “New”.
Check the following settings:
remote callsign: “Server1” (or WRD719)
remote host: 72.32.198.206 (or pop3.sailmail.com)
Port: 50
TImeout: (blank)
Local callsign: (your Sailmail/marine callsign)
Password: (your Sailmail internet password, Case-Sensitive!).
Click OK to save settings.

If you want to initiate a Data connection manually, open the Dial-Up Networking window and open the “Fleet” dial-up connection and click “dial”. And don’t forget to disconnect when you are finished!

support@sailmail.com
(revised 2015-06-24)

Computer Security

Most of us are well aware of the need to protect our computers from the hazards lurking on the internet, but it is less clear exactly what is needed. The danger is viruses or “worms” or “trojans”, different types of malicious programs that can infect your computer. (We’ll call them all “viruses” for simplicity). As long as the computer stays on the boat and only connects through Sailmail then it is safe. Viruses cannot get through the server- incoming mail is scanned but more importantly Sailmail does not forward file-attachments (except for certain files which are inherently safe) so there is no way to send a virus via Sailmail. (The same is not true for Winlink, malicious programs can be sent as file-attachments and a brand-new virus will always get past a scanner).

Think of your computer as a fortress surrounded by hordes of bad guys (e.g. the battle for Helms Deep in “Lord of the Rings: The Two Towers”). At sea, you have the world’s largest moat with a slender well-fortified bridge (Sailmail). If you connect your computer directly to the internet then you need both strong bastion walls and solders on the inside (firewalls and anti-virus software, respectively). The connections we are concerned about include wireless connections in a marina, a dial-up connection via a cell-phone, or taking the computer ashore and connecting it to a phone line or network connection. These all expose your computer to potential threats. The threats can come from a virus attached to email, or as part of a malicious website, or by a direct connection to your computer (think of ladders over the walls).

So the basic rules are to keep your operating system updated, protect your internet connection, never open a questionable email or a suspicious website, and keep your anti-virus updated.

Operating system updates are important in order to make sure that your computer is secure against known vulnerabilities which have been fixed.

In order to protect your computer from a direct connection you need a “firewall” to block unauthorized connections. Windows includes an effective built-in firewall which should be left turned on, check Windows Security-center on the Windows control-panel. There are normally no programs which require that it be turned off.

There are other firewall software programs available, including various “internet security” packages. Many of these go overboard in terms of protection, adding no security but seriously interfering with normal use of the computer. Also, do not attempt to use more than one software firewall, this can tie things into knots. Our advice is to use Windows firewall (and disable any others).

Most local wired or wireless networks include an internet “router” which also acts as a firewall by blocking direct connections from the internet. But an internet router will not block a connection from a fellow user of the local network, who might themselves be infected. So continue to use your computer firewall.

It is also important to disable file-sharing unless you need this for a local connection. Windows-7 manages this as “private” versus “public” networks. File-sharing is disabled for public networks, be sure this is selected for any sort of internet-connected network, unless you are protected by your own hardware router.

For Windows-XP file-sharing is controlled as part of the TCP/IP properties for the each network connection- uncheck the “File and Printer Sharing” box to disable all file-sharing.

The final level of protection is a good anti-virus program which is kept up-to-date. Most new computers come with a “trial” version of some “all-in-one” internet security program, free for a while and then needs a paid subscription. There are two problems here: The “all-in-one” solutions aren’t as good– and a lot more intrusive– than Windows firewall plus a good stand-alone anti-virus program; and there are free versions of good programs (supported by their corporate customers) that there is no real advantage to a paid program.

Microsoft Security Essentials is a well-rated anti-virus program that works well without getting in the way, we use that here. AVG/free anti-virus is also good, and Kaspersky and FProt are also good but apparently no longer have free versions. Symantec and Norton anti-virus programs work well, but they tend to be packaged with firewall software as “Internet Security” packages which are overly complex and intrusive, and we have to recommend against them.

Google or any browser search engine can find these, be sure to include “free” in the search as all of these folks like to push the paid version (except Microsoft, they already got your money).

Some folks take the view “anything but Microsoft”, ten years ago that was reasonable but things change. Particularly after they got past Vista they seem to “get it” to a much higher degree.

And remember that any anti-virus software is only as good as its most recent update.

There’s another tool work considering, and that is an anti-malware program to periodically scan for spyware and other nasties that aren’t malicious enough to qualify as a virus or worm, but stuff you definitely don’t want it on your computer. MalwareBytes anti-malware free version is highly regarded, as are teh free versions of “Spybot Search & Destroy” and “Ad-Aware”.

For all of these (except Microsoft) read the websites carefully, some push paid versions, or “free” upgrades to the full version (only free for a limited time), or try to trick you into installing some other “clean your PC” crap. Read the info carefully.

But remember that anti-virus software only works if it can find the virus in its database. So there is always an opportunity for a new virus to sneak through before the company can update the definitions and you can download them. For this reason it is still necessary to use common sense and not open a file attachment from an unknown sender, and avoid visiting suspicious websites. There are relatively few malicious websites but if you get a note from an unknown person asking you to check out an interesting website then don’t.

And lastly, beware of the “phishing” expeditions. If your bank writes to you and asks that you go to a website to re-verify something, don’t. Contact the bank first- it may be a pirate website trying to hijack your login and password information.

A few links:
Microsoft Security Essentials: http://windows.microsoft.com/mse
AVG Anti-virus free: http://free.avg.com
MalwareBytes anti-malware: http://www.malwarebytes.org

Good sailing!
Jim
support@sailmail.com

updated 2012-01-08

Using Iridium’s AxcessPoint with Sailmail

The Iridium AxcessPoint is a hardware device available from Iridium that connects to an Iridium handset and creates a wifi hotspot.

The Iridium AxcessPoint WiFi device comes from the factory programmed with a firewall to limit internet access, but port 50 (used for Sailmail access) is not open. The following setup will allow the AxcessPoint to be used with Sailmail, but for most applications it is simpler to connect directly to the Iridum phone and use the Iridium PPP setup (http://saildocs.com/iridiumPPP or send a blank email to: iridiumPPP@saildocs.com).

To use the AxcessPoint with Sailmail some initial setup is needed:

1. Connect to the AxcessPoint via WiFi using Windows wireless networking.
2. Open a browser and go to http://192.168.0.1
3. Login with the last 6 digits of the mac address. The mac address is on
the box and in the battery compartment.

Note that the Admin password can be changed Under Tools->Admin. However, there is no way to reset the unit so if the password is lost then unit must be returned to Iridium for service.

4. Go to advanced->Outbound Filter

Once there you need to add a rule which opens port 50. Then save settings, the device will reboot.

Other ports can be closed if no other use is planned. This will avoid competition for the Iridium Connection and may speed things up. You can also disable DNS on port 53 if you use the numeric-IP address instead of “pop3.sailmail.com” (see this page: http://saildocs.com/stations).

Don’t forget to save the settings and wait for the unit to reboot.

5. Log back into the unit then go to modem settings.
6. Change the mode to manual. This is especially important if the firewall is left open. Otherwise the unit will make a data call as soon as the user wifi connects to it.

Note that DNS is what brings up the connection so if you have blocked all the ports then “on demand” does not work. If you leave DNS open then any DNS activity on the users computer will cause the unit to start a PPP connection. So… it is best if you set this to manual.

Once in manual mode you will need to log in to the web page to bring up the connection and take it down.

Connecting to Sailmail:

Once the above setup has been done, connect to Sailmail as follows:

1. Connect to the AxcessPoint via WiFi.
2. Open a browser and login to http://192.168.0.1 (see above for password).
3. Go to status and hit the connect button wait for the unit to go online.
4. Back on the PC run AirMail and do your terminal session.
5. when done, go back to the browser and disconnect.

That should do it, please let us know of any problems or questions.

Cheers, Jim
support@sailmail.com

2018-02-21