Author Archives: Jim Corenman

Troubleshooting Airmail 3.5 Internet settings

Sailmail Internet / Satellite gateway settings were updated in June 2020, click here for info. If you need help with Airmail 3.5 then this page is for you, for Airmail 3.4 either update to ver 3.5 (strongly recommended for satellite use) or see this page.

This only applies to satellite or Internet connections using Airmail’s internet/satellite (Telnet) access window. Radio connections, webmail, and pop/smtp email are not affected.

If you have internet access then the best option is to update your Airmail ver 3.5 version, downloads since May 22, 2020 include the new gateway addresses. If you downloaded before then, then do it again– same software, new internet gateway settings.

If that is not possible then the rest of this is for you. It is organized from simplest to more complicated, keep going until success is achieved.

Airmail 3.5 will auto-update its internet settings from a special “update” message which was sent to all members, so if you received an update message into Airmail and clicked “Yes” to confirm the update, then you are finished. Skip down to “Checking” below.

If you can connect to Sailmail from Airmail via radio or Airmail’s internet window (not webmail or some other email), but have NOT seen an “update” message, then:

  1. Create a new, blank message to: satgates@saildocs.com and post that via Sailmail.
  2. Connect to Sailmail and send the message, wait a moment, connect again for the reply.
  3. Open that message, and click “Yes” to accept the update.
  4. Skip down to “Checking” below.

If you cannot connect to Sailmail via Airmail’s internet window, then try each server listed in the selection box at the top, next to the green “Connect” button. One of the backups should connect, then proceed as above.

If you CANNOT connect via radio or any of the servers from Airmail’s internet window, but you DO have internet access to Airmail, then use Airmai’s Mail Client window to send your update message to satgates@saildocs.com. For details on using Airmail’s Mail Client, click here.

If STILL no luck, and you don’t have internet access to update Sailmail (never mind that you are somehow reading this), then do this:

  1. Click Airmail’s “Window” menu, then “Files”, then “INI files”, and select “System.SAILMAIL.ini”. This opens the Sailmail settings file.
  2. This is a settings file, with various sections each marked with a square-bracket heading. Scroll down and find the “[Internet Gateway]” heading.
  3. Below that heading, and before the next square-bracket heading, is a section of server settings. Delete those, and replace the [Internet Gateway] section with the following:
... some other section data...
[Internet Gateway]
Server1=SMSG1,18.208.67.17,50
Server2=SMSG2,44.232.19.175,50
Backup1=WQAB964,174.67.172.21,50
... the next section heading ...

Click “File” Menu, Save (or Ctrl + S keys), then close and re-open the internet window and check as follows:

To check settings:

The new gateways are designated Server1 (SMSG1) and Server2 (SMSG2), and the backup is Backup1 (WQAB964, our San Diego station). To check, open Airmail’s Internet window and select each server “Server1”, “Server2”, and “Backup1” in turn and confirm that each connects. “Server1” should identify itself as “SMSG1” in the log text, check that for each.

Troubleshooting Airmail 3.4 Internet settings

Sailmail Internet / Satellite gateway settings were updated in June 2020, click here for info. If you need help with Airmail 3.4 then this page is for you, for Airmail 3.5 click here.

Note that this only applies to satellite or Internet connections using Airmail’s internet/satellite (Telnet) access window. Radio connections, webmail, and pop/smtp email are not affected.

If you have internet access then the best option is to update to Airmail ver 3.5. Airmail 3.5 downloads since May 22, 2020 include the new gateway addresses. If you downloaded previous to that, then do it again– same software, new internet gateway settings. (NOTE: The older Airmail 3.4 download is NOT updated– use ver 3.5).

An important note for sat-phone users: Airmail 3.5 includes a “dedicated route” feature for connecting via satellite, which limits access to Sailmail servers when the connection is open. This means much faster connections because other programs will be blocked from using your satellite connection for automatic updates. This is a huge advantage in terms of airtime usage. This is not available for Airmail 3.4, so if at all possible update to Airmail 3.5.

If updating is not possible, or if you prefer to stick with ver 3.4, then the rest of this is for you:

The default configuration for Airmail 3.4 uses domain names for the server (for example pop3.sailmail.com), which do not need updating. Open Airmail’s Internet Access window (yellow “lightning-bolt” button), and check the server selections– default is WRD719 and WHV382. Select WRD719 and click “settings”, if the server is “pop3.sailmail.com” then you are all set.

If you see a numeric IP address for “Remote host”, then you can either update the settings as detailed below or delete the current settings and re-open the Internet Access window– which will restore the default settings.

To manually update settings: Open Airmail’s Internet window (yellow “lightning bolt” button) and at the top, will be a selection-box for the available servers. Click the “Delete” button to delete each current setting.

Now click the “New” button, this opens a “Telnet settings” box. Make entries as follows (without the quotes):

  1. The first box is “Remote Callsign”, enter “SMSG1”
  2. The second box is “Remote-Host” enter “18.208.67.17”
  3. Next is “Port”, enter “50”
  4. Leave “Timeout (sec)” empty
  5. The “Local Callsign” will show your Sailmail callsign in a gray box– from the Options window.
  6. The “Password” box will show your Sailmail password– also from the Options window.

Click OK, and then click “New” again, and repeat those steps for the second server:
For Remote Callsign enter “SMSG2”, for Remote-Host enter “44.232.19.175”, for Port enter “50”.

Click OK, and then click “New” again, and repeat for the backup server:
For Remote Callsign enter “WQAB964”, for Remote-Host enter “174.67.172.21”, for Port enter “50”.

Click OK, and you’re done. If you have internet connected to the boat computer (marina wifi, cell-phone hotspot, or via the Iridium) then check each of the selections. Click the green “connect” button, it should connect to the server and check mail without any error.

Also please open Airmail’s Options window (Tools menu), Settings tab, and verify that your Sailmail password is correctly entered in the “System Password” box.

Then select each server in turn (SMSG1, SNSG2, and the backup WQAB964, click the green “Connect” button and verify that is connects without error. This can be via local internet, or your satphone or GO terminal– any internet connection.

If you have any questions, please send a new message to: support@sailmail.com

Good Sailing, and be safe!

Troubleshooting Internet / Satellite gateway settings

Of the various ways to connect to Sailmail via the internet, using Airmail’s satellite access (internet/telnet window) is by far the most efficient. It is ideal for satellite connections as well as “challenging” marina wifi connections as it supports the same compression, error-checking, and resume functions used for radio connections. This connection also uses static-IP addresses for the gateway connections for speed and security.

The only drawback is that addresses change when we move, and we recently (May-June 2020) upgraded our main servers which changed the IP addresses. We have established separate gateway servers (also with static IP addresses), and posted notices on the old servers and sent update notes to all members.

This only applies to satellite or Internet connections using Airmail’s internet/satellite (Telnet) access window. Radio connections, webmail, and pop/smtp email are not affected.

If you missed it, here is what to do:

  • If you have internet access, click here to go to our download page for Airmail software for Sailmail. Download and install version 3.5 (either the regular release or beta), that will also update your Airmail software and also update the gateway settings (for downloads since May 22, 2020). Do this, if possible, even if you already have Airmail ver 3.5, because it will update the internet settings.
  • If you don’t have internet, or don’t want to update Airmail at this time, then check which version of Airmail software you currently have: Click on the “Help” menu, then select “About”.
    • If you currently have Airmail version 3.5 installed (and downloaded prior to May 22) then click here for the Airmail 3.5 notes.
    • If you currently have Airmail version 3.4 installed then click here for the Airmail 3.4 notes.

And if you just want to check it, then open Airmail’s Internet/satellite window (yellow “lightning bolt” button, select “Server1”, and click the green connect button. It should connect and identify as “SMSG1” (Sailmail SateGate-1). Then select “Server2”, and connect- it should identify as “SMSG2”, and “Backup1” should identify as “WQAB964” (our San Diego station masquerading as a backup gateway). There may be additional entries, ignore those.

Using SailMail’s Satellite Gateways

There are many ways to connect to SailMail to to send and receive messages. For satellite and other low-speed internet connections, connect via the Satellite Gateways using our Airmail software. Formerly called Telnet servers, these are optimized for low-speed and/or expensive connections and use compression and error-checking for reliability and efficiency.

Current versions of Airmail will be pre-configured for gateway access, although previous downloads may need updating– see below.

Connecting is simple: Open Airmail’s internet gateway window (yellow lightning-bolt button) and click the green “connect” button. There are selections for which server, and some settings at the bottom for satellite connections, but it’s just about that simple. If you have internet access (marina WiFi, hotspot, etc) Airmail will connect, login and secure the connection, and send and receive all pending messages.

A couple of other things to note: You can set a max limit on message size, and larger messages will be held on the servers until you either increase the limit or right-click on the message in Airmail’s index and select it to be downloaded. This is useful for large messages on slow connections, which can wait until later.

You can also check the “check every XX minutes” box and Airmail will automatically check for mail (whenever it is running of course). Use this with great caution with metered (per-minute airtime) connections.

And see these pages for information on setting up satellite connections:

Settings: For Airmail ver 3.5 or later, you can update the gateway servers (and radio stations) at any time by sending a (blank) email to: stations@saildocs.com — the reply message contains a coded server/station list which will update Airmail settings.

Internet settings for satellite connections were updated in June 2020, for more info on settings or to troubleshoot a connection problem click here for the Internet troubleshooting page.

Using the Icom M803 with Sailmail

Icom’s new M803 Marine SSB Radio began shipping in early 2020 and is a terrific radio for use with Sailmail. It supports the latest DSC standard, incorporates Icom’s latest SDR radio designs, and also includes GPS (internal or external) and provides that data for position reporting. Any of the SCS modems are supported.

Connection is similar to Icom’s previous marine radios, with audio and control cables commecting radio to modem: One for the audio signals and a second cable for radio frequency control. While the M803 has the same “ACC” connector as the earlier M802 and M710/700pro radios, it is not compatible and a different cable is needed for the AF/MOD connector. Here are the details:

Modems: Any of the SCS Pactor modems including the DR-7400 or DR-7800 Pactor-4 modems, the PTC-IIIusb Pactor-2 modem, and any of the earlier PTC-II modem-series.

Cables: The audio cable is Farallon #9098 (2M, or 9099 for 4M). This is a new cable for the M803 (details below). Connect this from the modem’s “Audio” (“Main Audio” for the DR-7800) to the radio’s “AF/MOD” connector and plug the 8-pin DIN plug into the radio’s “ACC” connector (for 12V power).  The 9090 cable used on most Icom radios for the “ACC” connector cannot be used. The audio level settings should be 900/1200 for FSK/PSK respectively. Airmail’s “autoset” function has been updated and works well for the M803.

Frequency Control: The radio’s “REMOTE” frequency-control connection is via a standard RS232 serial port and can be connected to the modem with a Farallon #8083 cable (2M, or 8084 for 4M). Connect this from the modems “Control” connector to the radio’s “REMOTE” connector. Alternately use a standard serial cable from a computer serial port (or USB/serial adapter) to the radio’s REMOTE port (9-pin male-female). The M803’s Remote-ID is 20, and the baud rate is 4800 (avoid the higher rates).

Ferrites: It is important (with any radio installation!) that ferrite chokes be installed at each end of both cables from the modem to radio, and also at both ends of the USB cable from computer to modem (does not apply with a bluetooth connection). The ferrites should be located near each end, use a small cable-tie to prevent them from sliding down the cable. It is also a good idea to add a cable-tie around the ferrite itself to make sure it stays closed. The recommended ferrites are Type-31 material from Fair-Rite.

Modem setup: The only setup required is for a PTC-IIIusb/DR-7400/DR-7800, if you want it to power-on with the radio (and of course you do): Set Dip Switch #1 on the back of the modem to the DOWN position to power on automatically when the radio is powered on. 

Radio settings: Check the following settings in the radio’s setup menu. To change a setting press the radio’s MENU button , then use the arrows or the big knob select the setting and press the “enter” (ENT) key, then repeat for each sub-menu:

  • MENU > Configuration > Remote > Interface: Select RS-232C. Leave baud rate set to 4800 bps. Verify that MOD is set to AF/MOD.
  • MENU > Configuration > GPS > Internal GPS: Verify GPS, GLONASS and SBAS are set to On if using the external GPS antenna (see below).  
  • MENU > Configuration > GPS > External GPS: If an external GPS is connected via the BNC connector then verify the baud rate: 4800 for most connected GPS receivers, 38400 for a connected AIS receiver.
  • MENU > Radio Settings > Auto Tune: Select ON (assuming the AT-140 Icom auto-tuner is used). 

Other notes: The M803 has a Noise Reduction feature (under Radio Settings menu), it is recommended to leave this off for radio email– the modem has its own digital signal processing. Similarly leave the NB Level (noise-blanker) setting at minimum, and leave the RF-Gain setting set to max (9). Also use high TX-power mode (soft-key menu)– reducing transmit power will slow the connection.

Position Reporting: The M803 needs to be connected to a GPS in order for the DSC distress function to work– either using the radio’s internal GPS with a connected antenna, or (same as the M802) via the GPS-Data BNC connector from an external GPS. Where the M802 kept this data to itself, the M803 transmits the GPS data (from either source) via the REMOTE connector to the computer where Airmail (ver 3.5.054 or later) will pick it up.

What this means is that once GPS is connected to the radio for DSC, Airmail can update your lat-lon whenever Terminal window is opened, and Position Reports are updated automatically. Multiple formats are available including MarineTraffic to continue your AIS track offshore, CruisersCafe for Yotreps-style updates, and Sailblogs for a comprehensive tracking/blogging site.


PredictWind Weather via SailMail

The PredictWind weather service is popular with offshore sailors, and with a paid PredictWind subscription weather forecasts and routing can be requested via email including access via Sailmail.   Our Airmail software version 3.5.054 onward (from January 2020) streamlines access, but any older version can also provide simple access to PredictWind forecasts.   Any method of connection can be used: SSB radio, Iridium or Inmarsat handsets or terminals including the Iridium GO.

Continue reading

Shadowmail and Checking Gmail Accounts

“Shadowmail” is a service for Sailmail members which monitors a separate email account via POP3 access. For basic information about Shadowmail see this page: https://sailmail.com/shadowmail-info/ or send a (blank) email to: shadowinfo@saildocs.com.

This page describes how to use Shadowmail with Google’s Gmail accounts. Gmail POP3 email access is a bit “quirky” (some would say “distinctly odd”). The three great things about Gmail are that it is free, you get lots of space, and of course Gmail has great search tools for archived email. The “quirky” part is that Google is very strict about security, and also –depending on your GMail settings — POP3 can try to forward everything in your Gmail account, not just recent mail in your “inbox”. That is a problem if you have a large number of archived messages in your Gmail account (which may be the whole point of Gmail). If you pick the wrong option in setting up GMail’s POP3 access, then Shadowmail will try to send headers for all of those messages. This is bad, so please read the notes below on using the “recent:” prefix.

Setting up Shadowmail access for GMail involves three steps:

  1. Enabling POP3 access via settings in your Gmail account;
  2. Entering your Gmail login info into Airmail’s Shadowmail settings; and
  3. Resolving any security or access issues.

One caution: Do this when you have internet access, and be sure that your internet connection allows Airmail to access Sailmail directly. See this page for more info: https://sailmail.com/sailmail-messages-via-the-internet/ or send a (blank) email to: internet@saildocs.com.

Step 1: Setting up Gmail for POP3 access:
=========================================

First, you need to enable POP3 access from Gmail. Go to your Gmail account, click “settings” (the “gear” icon in the upper-right), then “See all settings”, then select the “Forwarding and POP/IMAP” tab.

In the “POP Download” section you can enable POP access either for “all mail (even mail that’s already been downloaded)”, or “only for mail that arrives from now on”. The first “all mail” choice is the equivalent of Gmail’s “All Mail” selection on the web, and shows all messages. IMPORTANT: If you select this, then use the “Recent:” login prefix– see below.

The second “from now on” selection is Gmail’s “Inbox”, which shows newly-arrived messages. The problem with this is that messages disappear from Inbox once they have been read, so if you are also checking mail from another device or the web page then Shadowmail won’t see them.

RECOMMENDATION: Select “All Mail”, and use the “Recent” prefix for your login.

In either case, select “Keep Gmail’s copy in the inbox”, it doesn’t matter for POP3 access but does affect how new messages are presented on the Gmail web page.

Step 2: Airmail settings for Shadowmail:
========================================

The basic Shadowmail setup for Gmail is the same as for any account: The server address is “pop.gmail.com” (without the quotes), the login name is your complete gmail.com email address (with the “recent:” prefix), and the password is your Gmail account password. A secure connection is required via port 995 but Shadowmail handles that automatically.

IMPORTANT: If you did selected “all mail” in your GMail settings, then you should restrict POP3 access to only recent messages (less than 30 days old). Do this by adding “recent:” to your login name in your Shadowmail settings– for example  “recent:username@gmail.com” instead of “username@gmail.com”– no spaces. This will cause Gmail to only show recent messages to Shadowmail, and older messages will be ignored.

Keep in mind that (no matter what options are selected) GMail’s POP3 access includes sent-messages which were sent from GMail’s web-page. Also, unless you are using the “recent:” login-prefix described above, messages which have been read via GMail, or retrieved via POP3, are NO LONGER included in the POP3 index- they will disappear from your Shadowmail folder, but are accessible via Gmail. However, if the “recent:” prefix is used, then all recent messages are available to Shadowmail. (Like we said, “quirky”).

Once you get your Shadowmail settings set up for your Gmail account, then connect to Sailmail (via internet, initially) and Airmail will send the settings message to the server. Shadowmail will immediately check your Gmail inbox, and you should get the initial batch of “new mail” messages. This will sync your Gmail “Shadow Folder” to your Gmail account.

Instead of a batch of “New Mail” messages, you may get an error message instead– have a look in “Shadow archive” folder under Airmail’s “Inbox”.

Use an “App Password” for Shadowmail:
=============================================

Gmail previously allowed you to check email with your normal Google password, once a new device was authorized. This has become more difficult but may still work if you have recently updated your Google password. With an older password, Gmail will not allow access from a new device. So one option is to update your password. But a more reliable method is to get a special “App Password” for Shadowmail. However, Google only makes this available if “2-Step Verification” is enabled.

So the first step is to turn on “2-Step Verification” (if not already done).  This is now required in order to get an App Password. This also helps to protect your Google account. This means that you can only access your main Google account (including Gmail via the web) if you can also verify access with a second step: Either a smart-phone with internet access, or a simple cellphone capable of receiving text messages, or — most important for our needs– a list of one-time “backup Codes” printed on paper.

To learn more, and turn on 2-Step Verification, see this Google web page:  https://support.google.com/accounts/answer/185839

Once that is done, go to your Google account settings (under your icon in the upper-right), select “Security”, then “Signing In”, then “App Passwords”. For “Select App” click “Other”, enter “Shadowmail” and then copy the password shown (a 16-digit number, don’t include the spaces).

For more informal about App-Passwords see this web page:   https://support.google.com/accounts/answer/185833

Other security issues:
========================================

If you have entered the incorrect username or password then you will see:
“[AUTH] Username and password not accepted”. Check your username and password. If you are using an App Password then do not include any spaces.

Alternately you may have run afoul of GMail’s security checks, in which case you will see a message something like this:
Exception while connecting: [AUTH] Web login required:
https://support.google.com/mail/bin/answer.py?answer=78754

That is stunningly unhelpful, but if you follow that link then you will get some vague advice about updating your email client (not applicable),  using App Passwords, or allowing “less secure apps”.

Allowing “less secure apps” means allowing access with a username and password. With a strong password and a secure connection (which Shadowmail uses) this is quite secure, the problem is that if your password gets stolen then that allows access to all of your Google accounts. Selecting “Allow less-secure apps” worked previously for POP3 access, but we could not make it work in our testing (mid-July 2021), and is also not available when 2-Step Verification is enabled. Therefore we recommend 2-Step Verification as the

Turning on “2-Step Verification” is a nuisance but is a reliable solution. Select as many alternate devices as you can, and if you have a security key then use that also.

And be sure to select “Backup-codes” and save that. This is a list of ten one-time codes that can be used to access your Google account (not Shadowmail). Cross them off once used, and get a new set after you’ve used a few.

Once you have sorted out your Google settings, you can trigger Shadowmail to check your account as follows:

  1. Open Airmail’s Shadowmail settings (Tools menu)
  2. UN-check the “Account active” box. This creates a new settings message.
  3. Connect to Sailmail (preferably via internet) to send the settings.
  4. Go back to Shadowmail settings and CHECK the “Account active” box.
  5. Connect again to Sailmail, to send the updated settings message.

This disables and then re-enables Shadowmail, and will trigger a new-mail check. Be sure to connect to Sailmail via internet each time, to send the updated Shadowmail settings message.

Wait a minute or two and check Sailmail again– you should have a batch of “new mail” messages.

Finally…
===========
As with other web-based email accounts, keep your Inbox tidy by archiving messages that you want to save and deleting the rest. Gmail does not provide separate archive folders but you can add labels which is basically the same thing.

Please note that this information is current as of late 2022, but internet security evolves rapidly and things change. Please send a note to support if you have problems and we will try to help sort it out.

Revised 2022-10-06 by Jim, Sailmail support

Shadowmail – Checking other email accounts via Sailmail

“ShadowMail” is a Saildocs service which provides a method of monitoring a separate email account, and for downloading or forwarding messages as needed. This is available only to Sailmail members, and without charge.

The purpose of Shadowmail is to act as a bridge between your Sailmail address and whatever other email address you might use for regular email. The great advantage of Sailmail of course is that it works pretty much anywhere, but connection speeds are slow whether via radio or satellite. This means that you need to keep your Sailmail address private, and limited to friends and associates who understand not to send jokes, spam, etc.

We strongly recommend maintaining some sort of regular land-based email address for routine mail, on-line ordering, etc. This can be a regular personal or company email account, or a Hotmail, Yahoo or Gmail address for “public” use. These folks will keep your low-priority mail forever (Hotmail and Yahoo may require a small annual payment for this) until you can check mail from an internet-cafe. The problem of course is that folks sometimes send important messages to your regular address, and you have no way of knowing. Enter the Shadow…

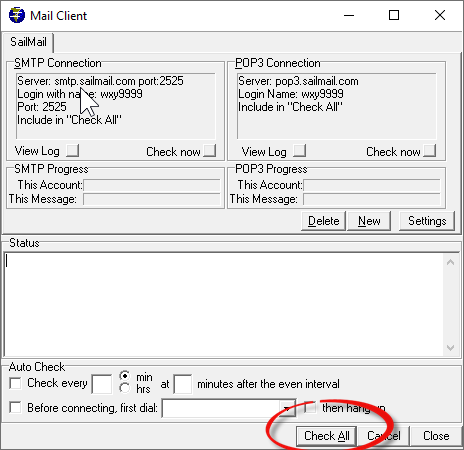
Once you set it up, the Shadowmail server checks your regular email account a few times a day and sends you a summary of whatever new messages have arrived. Airmail decodes those “new mail” messages to maintain a “shadow” folder for each regular email account, showing the contents of that mailbox as a separate Airmail folder. For example, assume that you set up Shadowmail to monitor your Hotmail account. Then in addition to the usual “Inbox” and “Outbox” folders in Airmail, you would also have a “Hotmail” folder with a gray icon instead of yellow, indicating a “shadow” folder. When you open that folder you see a list of messages which are currently pending in your Hotmail account, showing from- and to-addresses, subject and date.

If you want to download one of those messages via Sailmail then right-click on that message and select “retrieve”. If you want to forward it to someone else (without downloading it) then right-click on it and select “Forward”. If you want to delete it without ever reading it, then right-click and select “Delete”. If you go to the local cyber-cafe and read and delete some of the Hotmail messages, then they will be removed from Airmail’s shadow-folder on the next update. The Hotmail shadow-folder will always match the contents of the Hotmail “inbox”.

To use Shadowmail a current version of Airmail is required, and you must be a Sailmail member. Shadowmail can be used via a radio connection, or via internet or satphone using Airmail’s Internet window. The first step is to read this document carefully and make sure that you understand the limitations. By using Shadowmail you are agreeing to the conditions contained here, and to the Saildocs terms and conditions (terms@saildocs.com).

To set up Shadowmail to monitor an email account, first enable Shadowmail and open the “Shadowmail Settings” window. Start by opening Airmail’s Options window (from the Tools menu), and then click on the “Modules” tab. Check the box to the left of “Shadowmail” (if not already checked) and click the “Setup” button to open the settings window.

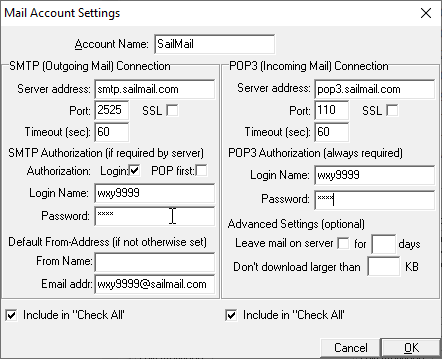
Initially this “Shadowmail Setup” window is empty, click “New” to create a new account and give it a name. Then enter the server-address (the internet address of the “POP3” server), the login name and the password for the email account that you want to “shadow”. (This is NOT your Sailmail login, you need to get the server, login-name and password from the outfit that handles the email account that you want to monitor). Make sure “Account Active” is checked, and then click OK. Airmail will send a settings-message to the server and it will start monitoring your account. Mail is checked every 6 hours and you will get a message from the server (“shadow-reply@saildocs.com”) whenever new mail is received into that account.

Shadowmail can check any POP3 mail account, such as a business or regular Internet account. The Internet provider will supply the server address, login name and password. Keeping your mailbox tidy will make it easier to keep track of things. A good technique is to wait until you have Internet access at a marina and then retrieve everything you want to save to Airmail and delete it from the server. Alternately you can forward messages from the Shadow folder to another account, such as Hotmail or Gmail for safekeeping.

Here’s how some accounts are handled. For any of these you will need internet access to get things set up.

Microsoft Hotmail / Outlook / Live / Office365: POP3 access is provided to all Microsoft email accounts, but the “Premium” (paid) service may be required. Use the server-name “outlook.office365.com” (hotmail.com, pop3.live.com, pop-mail.outlook.com also work). Use your complete email-address as the login name, and you can use your normal password. However the first time that Shadowmail connects it will be blocked. To allow the connection go to your Microsoft mail settings and select “Security” (may be under “Premium”), and view “Recent Activity”. If Shadowmail was blocked then you see an entry there, check the time-stamp and click “That was me”.

If you have Microsoft’s “Two-step Verification” enabled then you will need to use an “App Password”, also under the Security tab. Use that in place of your normal password in Shadowmail settings.

Yahoo: Free Yahoo accounts also support POP3 access, and requires an “App Password”.  You may also want the paid service which provides additional storage and avoids deactivation. Use the server-name “pop.mail.yahoo.com”, the login name is your Yahoo email address, and for password you need an “App Password” (search Yahoo help for “Generate app password). Note that 2-step verification is NOT required for an app password. Again, keep your inbox tidy by moving messages that you want to keep into other folders, and deleting the others.

Google Gmail: Shadowmail can also check Gmail accounts, but Gmail is a little “quirky”.  Open Gmail settings (gear-icon, then “See all settings”), click on “Forwarding and POP/IMAP”, and select “Enable “POP for all mail”. Selecting “all mail” and using the “recent:” prefix (below) selects all messages received within 30 days. You will also need an “App Password” for Shadowmail, which requires 2-step verification. Those are found on your Gmail “Security” page, under “Signing in”.

In Shadowmail settings the server name is “pop.gmail.com”, login name is “recent:” followed by your complete GMail email-address (i.e. “recent:username@gmail.com”), and for password enter the App Password that you created for Shadowmail. For more details send a (blank) email to shadow-gmail@saildocs.com or see the web page at https://sailmail.com/shadowmail-checking-gmail-accounts/

AOL: AOL has added POP3 access and Shadowmail can check AOL accounts. The server is “pop.aol.com”, the login-name is your AOL “screen name”, and the password is your AOL login password. The server may occasionally return a “timeout” error, double-check the server-name and don’t worry, Shadowmail will keep trying.

For any email account: if you get back an error-message then double-check the POP3 server-address. Make sure the login name is correct, sometimes it is just your email name, or it may be the complete email address, or perhaps something completely different. Check the support information for the folks who provide the account, they will need to supply that info.

For accounts that have both a free and paid version, check what features are included. generally paid accounts offer more storage, don’t de-activate if the account is not used, and in some cases POP3 access requires a paid account.

Also remember that Shadowmail has to check everything in your Inbox folder whenever it checks mail. So it is important to keep things tidy by moving messages that you want to save into “archive” folders and deleting the rest. Create new folders for specific topics (or by year, for example) and move messages that you want to save into those folders for safekeeping after you have reviewed them.

You can also set up Shadowmail rules that will forward specific messages to your Sailmail address whenever they are received. For example, you can set up Shadowmail to forward anything with “urgent” in the Subject-line, and then give your business-associates your Hotmail address and tell them to include that word in the message-subject if they need an immediate reply. They don’t have your Sailmail address, but you can still be in touch- and in control. These “rules” are part of Airmail’s Shadowmail settings window, and can include two different checks, for example sender contains “mom” and size less-than 2000.

Replies that you send for messages which were retrieved by Shadowmail will of course be sent via Sailmail’s servers, and would normally come from your Sailmail address and with the how-to-reply footer added to the bottom. However if you are replying to a message which was retrieved via Shadowmail, then Airmail should substitute that reply address. Check this, however, and if you don’t see the “From” box in the message header then select the Message Menu, “Show From-Box”. A new box appears, enter the address that you want your email to be sent from.

Also, to suppress the Sailmail footer, add a line at the bottom of your message which says “short-footer” (without quotes) for a one-line footer “radio email processed by SailMail” and web-address) or “no-footer” for no footer at all. This should be on the last line, by itself, without quotes.

Some caveats and limitations: Shadowmail normally only sends a notice for new messages, not the entire mailbox. But when the account is first set up then the whole mailbox is indexed, and this can be large. If you have a lot of pending messages then try to do this via internet, not radio. Also, remember that the Shadowmail server must download the index for the entire mailbox whenever checking mail, this gets time-consuming if there are a lot of pending messages. The current limit is 1,000 pending messages, this may be adjusted up or down if needed. It is convenient to use the web-based mailboxes (Hotmail, Yahoo, GMail, etc.) as message-archives, but move messages to other folders and don’t keep them in the “inbox”. You won’t be able to use Shadowmail if there are too many messages in the inbox.

Also be careful and selective about setting up an automatic retrieval, and never set up Shadowmail to retrieve everything. Remember that the headers are always sent, and you can retrieve any message- the only reason for automatic retrieval is for messages that you are sure you want, so be selective.

Saildocs is a service of the Sailmail Association. For more information about Saildocs, send a (blank) email to: info@saildocs.com (or see the website at www.saildocs.com/info).

Please send questions about Shadowmail or Saildocs to: support@sailmail.com

Good sailing, Jim

(updated 2021-07-15)

Sending Position Report to SailBlogs

SailBlogs is an independent position-reporting service. There is no affiliation with SailMail but we like their style and have provided support for their service with our Airmail software. SailBlogs offers free accounts but in order to post position-reports and log updates via email, a “Premium Basic” account is needed with a small annual fee.

A discount coupon code is available for SailMail members, contact us for info.

Continue reading